
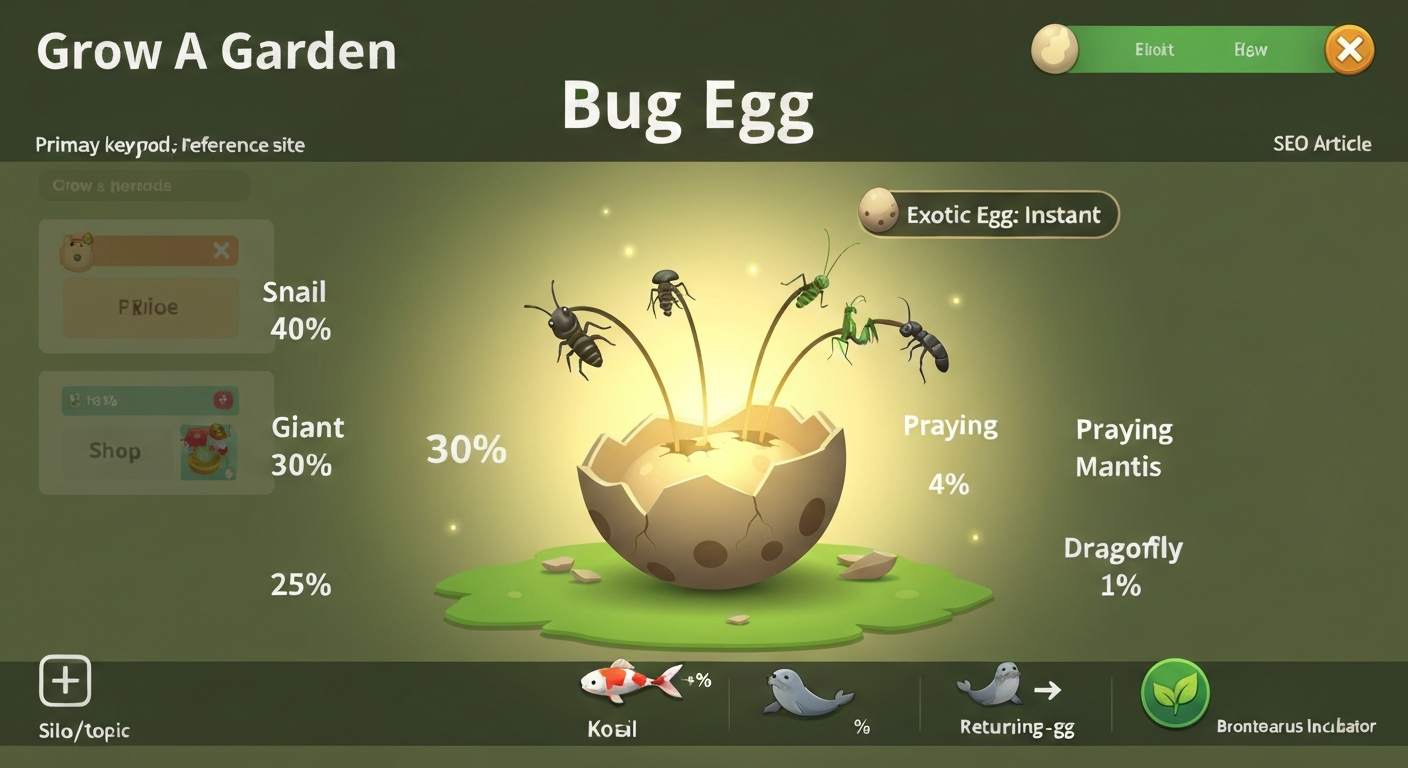
The base Bug Egg in Grow A Garden hatches from a five-creature pool: Snail at 40%, Giant Ant at 30%, Caterpillar at 25%, Praying Mantis at 4%, and Dragonfly at 1%. The Exotic Bug Egg shares the same pool but hatches instantly and is limited to event availability. Multi-hatch eggs like the 3-Bug Egg apply those same per-creature weights across three independent rolls. Mechanics like the Koi egg-return formula and Seal selling refund can multiply your effective hatch count without buying more eggs, and they stack with any active event boosts. Everything below is based on community-verified tables (cross-referenced across PC Gamer, the Fandom wiki, and GAGdata.com) with patch dates noted, because these numbers do shift between updates.
Grow A Garden Bug Egg Odds: Hatch Rates, Breeding Tips

Julian Russo
22 Jul 2026
Odds at a glance
Here is a condensed reference for every egg type currently documented. All percentages reflect the community-verified pool as of mid-2026. If a major patch drops after July 2026, cross-check against the official Discord or a datamine before trading on these numbers.
| Egg Type | Snail | Giant Ant | Caterpillar | Praying Mantis | Dragonfly | Hatch Time | Notes |
|---|---|---|---|---|---|---|---|
| Bug Egg | 40% | 30% | 25% | 4% | 1% | Standard | Base shop egg |
| Exotic Bug Egg | 40% | 30% | 25% | 4% | 1% | Instant / ~30s | Event/limited; same pool |
| 3-Bug Egg | 40/30/25/4/1% per roll | — | — | — | — | Standard x3 | Three independent draws |
| Event / Special Eggs | Varies by event | — | — | — | — | Varies | Separate or modified pool |
Quick recommendations: if you want a Dragonfly, expect to open roughly 100 Bug Eggs on average before hitting one (1% chance per hatch). Praying Mantis is about a 1-in-25 shot (4%). For anything rarer on the pool, the Exotic Bug Egg does not improve your odds per hatch since the pool is identical, its real value is speed and limited-time access, not better chances. The 3-Bug Egg is your best volume play if you want to farm common creatures fast.
Basic Bug Egg breakdown
The standard Bug Egg is the workhorse of the bug-pet system. It is available through the in-game shop at regular intervals and has no special conditions attached. Every hatch is an independent draw from the five-creature pool, so your odds reset completely each time: 40% Snail, 30% Giant Ant, 25% Caterpillar, 4% Praying Mantis, 1% Dragonfly.
In practical terms, if you hatch 10 Bug Eggs you should expect around four Snails, three Giant Ants, and two or three Caterpillars, with a roughly 34% chance of seeing at least one Praying Mantis across all ten hatches. Dragonfly is genuinely rare; a 1% rate means there is still a 60% chance you go 50 hatches without one. Plan your farming budget around that variance, not the average.
The best use of a standard Bug Egg depends on what you are chasing. For bulk common creatures to feed into breeding chains or trading stacks, the Bug Egg is efficient and cheap. For Dragonfly or Mantis specifically, calculate whether it is cheaper to hatch in volume or buy the pet directly from another player. At 1%, you need roughly 69 hatches to have a 50/50 shot at Dragonfly, and around 230 hatches for a 90% probability. Those numbers matter when eggs have a real in-game currency cost.
Exotic Bug Egg breakdown
The Exotic Bug Egg generates a lot of hype, but it is important to say this directly: the hatch pool is identical to the standard Bug Egg. You are getting Snail 40%, Giant Ant 30%, Caterpillar 25%, Praying Mantis 4%, Dragonfly 1%, same weights, same creatures. The difference is that the Exotic Bug Egg hatches instantly (or in approximately 30 seconds depending on the version), and it only appears during events or limited shop windows.
Where the Exotic Bug Egg earns its price is in time-sensitive situations. If you are trying to hit a hatch volume target during an event window, the near-instant hatch timer means you can chain dozens of opens in the time a standard egg would complete one. For players who are specifically targeting Dragonfly during a limited event, the Exotic Bug Egg lets you burn through attempts faster. It is also worth noting that some community sources flag Exotic and Premium eggs as excluded from the Koi egg-return mechanic, so factor that into your efficiency math before stocking up.
From a value standpoint, the Exotic Bug Egg is worth it if you value speed or are in a time-gated event. It is not worth a significant premium over the standard egg on pure odds alone. The creature pool is the same. More detail on the Exotic Bug Egg, including how to obtain it and event timing patterns, is covered in the dedicated exotic bug egg guide on this site.
3-Bug Egg and multi-hatch eggs
The 3-Bug Egg gives you three independent creature draws in a single egg open. Each draw uses the same base pool (40/30/25/4/1%), and they do not interact with each other. This is a straightforward volume multiplier, not a probability modifier. You are not more likely to get a Dragonfly per draw just because there are three rolls; your chance of getting at least one Dragonfly across all three draws is about 2.97% (1 minus 0.99 cubed).
Here is where the 3-Bug Egg becomes genuinely interesting for optimization. If you are farming common creatures like Snail or Giant Ant to fuel trades or breeding chains, the 3-Bug Egg is the most efficient format. Three draws per open means fewer shop interactions and faster stockpiling. For rare targets like Dragonfly, the math is still unfavorable in absolute terms, but the 3-Bug Egg at least triples your hatch throughput compared to opening single eggs one at a time.
One practical tip: when using Koi-based egg-return mechanics alongside multi-hatch eggs, make sure you understand whether the egg-return triggers once per egg open or once per creature hatched. Community sources are not fully consistent on this interaction, so running a small controlled batch before committing to a large farm session is worth the time. The 3-Bug Egg also pairs well with Brontosaurus or Giant Incubator-type pets that boost hatched creature weight, since each of the three draws may independently receive the size modifier.
Event and special eggs
Event and special eggs operate differently from the standard pool. While the Exotic Bug Egg reuses the base pool, some event eggs introduce entirely separate creature pools or modified weighting that temporarily inflates the chances of specific creatures tied to that event's theme. The specific percentages depend entirely on what the developers announce for each event, so this section covers the mechanics rather than quoting numbers that will be outdated by the next patch.
The most important thing to know about event eggs is that they often bypass or are excluded from certain passive mechanics. Multiple community sources note that Premium and Exotic eggs are excluded from the Koi egg-return formula, and event eggs frequently fall into the same exemption category. This means you lose the compound efficiency of egg-return farming when chasing event exclusives. If an event egg has a notably improved pool for a creature you want, the answer is usually to hatch as many as possible during the event window rather than trying to engineer a Koi-based farming loop.
For events that modify hatch speed, pool composition, or add entirely new creatures to the pool, the best source of current numbers is always the official patch notes on playgrow.io or the official Discord. Community wikis lag by hours to days after a patch, and table conflicts between fan databases are common enough that I always recommend a quick Discord check before making large egg purchases during an active event.
Species-specific hatch chances
The five creatures in the Bug Egg pool have very different practical implications depending on what you are farming for. Here is a direct breakdown of each species, what to expect per hatch volume, and whether it is worth targeting directly.
| Creature | Base Chance | Expected hatches for 50% probability | Expected hatches for 90% probability | Worth targeting directly? |
|---|---|---|---|---|
| Snail | 40% | ~2 | ~5 | No — drops constantly, trade surplus instead |
| Giant Ant | 30% | ~2 | ~7 | Depends — useful in breeding chains; see ant guide |
| Caterpillar | 25% | ~3 | ~8 | No — common enough to buy cheap from trades |
| Praying Mantis | 4% | ~17 | ~57 | Yes — hatch volume or buy if price is right |
| Dragonfly | 1% | ~69 | ~230 | Buy unless you have a Koi loop running |
Giant Ant deserves a specific note because it is one of the more nuanced creatures in the bug pool. At 30%, it is relatively common, but its value in breeding combinations and its stats make it worth farming deliberately if you are building a specific team composition. The dedicated ant guide on this site goes deep on Giant Ant breeding chains and stat optimization. For Praying Mantis, the 4% rate is annoying but tractable: over 50 hatches you have around an 87% chance of seeing at least one. Budget around 60 to 80 standard Bug Eggs per Mantis you want to reliably obtain.
Dragonfly at 1% is the creature most players underestimate the cost of. The expected value is one Dragonfly per 100 hatches, but that is the mean of a geometric distribution with high variance. You could get one in 10 hatches or go 400 without one. If Dragonfly is your specific target, compare the current player trade price against what 100 standard Bug Eggs cost you in-game. In most market states, buying from a player is significantly more efficient than raw hatching unless you are running a high-efficiency Koi return loop. More on all named bug animals and their stats is covered in the bug egg animals and bug egg stats guides on this site. For full species pages and stats, see the bug egg animals guide on this site (internal reference 535cf833-a77c-4e64-a742-323ebf1278f0). See our grow a garden bug egg tier list for ranked recommendations on which hatches to prioritize.
How game mechanics change your actual odds
Koi egg-return mechanic
The Koi pet has a documented egg-return mechanic that gives you a percentage chance to receive a refund egg after each hatch. The community-cited formula is: Egg-return chance (%) = (0.22 x Koi_weight) + 3. So a Koi with a weight of 10 would give you a (0.22 x 10) + 3 = 5.2% chance of getting your egg back after each hatch. At higher weights, this becomes a meaningful multiplier on your effective hatch count. A Koi with weight 50 would theoretically give you a 14% egg-return rate, meaning roughly one in seven hatches generates a free additional egg.
The important caveat is that this mechanic is documented as applying to standard (non-Premium, non-Exotic) eggs. If you are running an Exotic Bug Egg session, you likely do not get Koi returns. For pure volume farming with standard Bug Eggs, investing in a high-weight Koi is one of the best passive efficiency upgrades available. To calculate your effective hatch budget: if you start with 100 Bug Eggs and have a 10% Koi return rate, your expected hatch count is 100 / (1 - 0.10) = approximately 111 hatches. At 14% return, that same 100 eggs yields about 116 hatches. The gains compound slightly but are not dramatic until Koi weight gets very high.
Seal selling refund
The Seal pet has a separate mechanic: when you sell a pet, there is approximately a 2.42% chance the sold pet returns to you as its egg. This is a low-probability bonus, but it is essentially free over large volumes. If you are routinely selling off surplus Snails or Caterpillars from your Bug Egg hatches, the Seal's refund mechanic occasionally turns a sale into a free hatch opportunity. It is a background efficiency gain rather than something to build a primary strategy around.
Brontosaurus and size/weight boosters
Community databases document that the Brontosaurus and Giant Incubator-type pets increase the weight or size of hatched creatures. This does not change which creature hatches (your Dragonfly odds stay at 1%), but it affects the stat ceiling of what you get. For creatures where weight or size is a key value driver, running a Brontosaurus or equivalent alongside your hatching session means the creatures you do get come out with better baseline stats. If you are farming to sell, size-boosted creatures consistently trade at a premium.
Event boosters and active pool changes
During events, the game may apply temporary pool modifications or hatch-speed bonuses. These are always patch-specific and should be verified against current patch notes. The key thing to track is whether the event boost changes the pool weights (making a rare creature temporarily more common) or simply speeds up hatch time. Pool weight changes are high-value windows for farming rare creatures. Speed bonuses alone are useful for volume but do not improve your per-hatch odds.
Hidden weights and pool stability
One thing to be honest about: community-documented percentages (including the 40/30/25/4/1 table) are derived from large-scale player-reported hatching logs and cross-referencing across multiple guide sites, not from a published official drop table. The numbers are consistent enough across sources like PC Gamer, the Fandom wiki, and GAGdata.com to be reliable for planning, but they are not guaranteed to be pixel-perfect accurate at the 0.1% level. Statistically, to measure a 1% drop rate with a ±1% margin of error at 95% confidence, you need about 9,604 independent hatches. For ±2% accuracy, you need around 2,401 hatches. Community aggregate logs get into those ranges, but individual player experience will vary wildly in the short term.
The practical upshot: the published percentages are reliable for strategic planning and budgeting. Do not use them to conclude something is 'broken' or 'bugged' based on fewer than a few hundred personal hatches. Variance at 1% rates is extreme over small samples. If you want to verify current numbers yourself, run controlled batches where you note the egg type, whether Koi or other modifiers are active, and the exact result of each hatch, then compare your log against the community table after 200-plus hatches.
Practical strategies for optimizing your Bug Egg outcomes
Volume farming for common creatures
If your goal is to accumulate Snails, Giant Ants, or Caterpillars quickly for trading or breeding, the 3-Bug Egg is the most efficient format. Pair it with a Koi pet of the highest weight you can acquire to generate passive egg refunds and stretch your stock. Seal selling mechanic adds a minor background bonus when you offload surplus creatures. This combination maximizes creature-per-egg-purchased with minimal manual effort.
Chasing rare creatures (Mantis, Dragonfly)
For Praying Mantis, budget 60 to 80 standard Bug Eggs per target. For Dragonfly, first compare the current player trade price against the cost of 100 standard Bug Eggs. If trading is cheaper, buy. If you are committed to hatching, run the Koi loop to maximize effective hatch count, use standard (not Exotic) eggs to keep the Koi return mechanic active, and batch your sessions so you are tracking results. Stop and reassess at 200 hatches if you have not hit your target; variance is real but 200 hatches puts you well into the expected range.
Trade versus hatch decision checklist
- Check the current player trade price for your target creature.
- Calculate the expected hatch cost: divide 1 by the drop rate, then multiply by the current Bug Egg cost. For Dragonfly: 1 / 0.01 = 100 expected eggs.
- Add the Koi efficiency multiplier if applicable (divide expected egg cost by (1 - Koi return rate)).
- If trade price is below your adjusted expected hatch cost, buy from another player.
- If trade price is above your expected hatch cost or Dragonfly is not available in trade, hatch with the Koi loop running.
- During events with modified pools, recalculate using the event-specific drop rates from patch notes.
- Always cross-check any drop table you are using against the current patch date before a large purchase.
Stat optimization: when hatch type matters
The creature you hatch and the stats it arrives with are partially separable. Running Brontosaurus or Giant Incubator-type pets during your hatch session affects the size and weight of whatever creature comes out of the egg. For creatures where those stats drive trade value or breeding output, running a size booster is a straightforward improvement to your per-hatch yield quality. For creatures where size is irrelevant to your goal, skip the booster and invest that pet slot in something more useful. Full stat ranges for each bug creature are covered in the bug egg stats guide on this site.
A note on data reliability and staying current
The 40/30/25/4/1 Bug Egg pool is the most consistently cited set of numbers across community sources as of July 2026, but it is worth being transparent: these figures come from community aggregate logs and cross-site verification, not an official published table. Fan databases and wikis sometimes show conflicting entries for the same egg, which is a known problem in the community. The safest approach is to treat the published percentages as reliable planning benchmarks while staying alert to patch notes that modify pools. Patch Notes Archive, GAGdata.com (community patch notes archive used to track mechanic/odds changes) maintains a dated mirror of community-collected patch entries useful for tracking pool and mechanic changes Patch Notes Archive — GAGdata.com (community patch notes archive used to track mechanic/odds changes). The official Grow a Garden Discord and playgrow.io are the fastest places to catch changes. Community tools like the GAGAPI project also allow players to scrape live shop and egg data, which advanced users can use to track pool changes over time. If you are making a large investment based on hatch odds, verify the table snapshot date and check whether any update has dropped in the past week.
FAQ
What’s a search-friendly title and a ≤160-character meta description for this guide?
Title: "Grow A Garden: Exact Bug Egg Hatch Odds, Breeding Strategies & Value Guide". Meta description (≤160 chars): "Data-driven hatch odds for every bug egg, breeding/farm strategies, pet value tiers, and a printable checklist to optimize Grow A Garden bug pets."
Odds at a glance — quick summary of base hatch chances for Bug Egg types
Bug Egg (base community table): Snail 40%, Giant Ant 30%, Caterpillar 25%, Praying Mantis 4%, Dragonfly 1% (corroborated by PC Gamer and fan wikis; treat as community-reported base pool — see sources). Exotic Bug Egg: same pool but instant hatch and limited availability (community sources/Fandom). Multi‑pet eggs (3‑bug/tri eggs): pooled draws or multiple independent draws; treat as three independent Bug Egg draws unless egg tooltip/datamine says otherwise (requires verification per patch). Event/special eggs: pools vary by event — consult patch notes/egg tooltip.
What exact hatch odds exist for every official bug egg type and named species (ants, snails, etc.)?
Canonical community base for a standard Bug Egg: Snail 40%, Giant Ant 30%, Caterpillar 25%, Praying Mantis 4%, Dragonfly 1% (sources: PC Gamer, fan wikis). Exotic Bug Egg uses the same species pool (community-reported). For event/special eggs, specific species odds change per event and must be taken from current patch notes or explicit egg tooltips — community databases disagree across snapshots, so always confirm with timestamped sources. Where exact per-species odds are unconfirmed by datamine, treat values as empirical community estimates and mark as such.
How do breeding combinations and pairs change species odds?
Officially, breeding combos are not always publicly datamined. Community practice: specific breeding pair recipes bias output toward target species (e.g., breeding two Giant Ants raises Giant Ant probability). To quantify effects you must collect controlled breeding logs. Recommendation: assume breeding shifts weight toward offspring-related pool; measure by running controlled batches and comparing to base Bug Egg rates (see experimental protocol). Label conclusions as empirical unless confirmed by developer notes/patch.
What mechanics modify hatch odds (Koi egg-returns, seals, boosters, pools) and how do they affect outcomes?
Known mechanics from community sources: (1) Koi-style pets: increase chance to return an egg when a pet is sold; community formula cited: Egg-return% ≈ 0.22×Koi_weight + 3 (does not apply to Exotic/Premium eggs) — empirical community claim; (2) Seal / selling-pet return: some pets give a percent chance to recover an egg when selling (community DB entries list example rates); (3) Incubators/boosters: some pets/items change hatch speed and reported weight/variant distributions; (4) Event/exotic eggs: may be excluded from return mechanics or have instant hatch. All modifiers are community-documented — treat as confounders and log their presence in experiments. Sources: GrowAGardenDB, community guides, GAGAPI scraping projects.
How do rerolls and shop/shop-stock mechanics affect effective odds and strategy?
Rerolls in the shop change effective acquisition odds: if you repeatedly refresh until an egg appears, your effective cost equals average number of refreshes times price. Use live shop scraping (GAGAPI) to compute empirical spawn frequency for egg types and calculate expected coins per desired egg. For hatching odds, rerolls only affect which eggs you can buy; they don't change innate hatch probabilities unless the egg type itself has different pool (e.g., Exotic Bug Egg). Track timestamps and shop-instance IDs when scraping to avoid bias.
Next Article
Grow a Garden Bug Egg Animals: How to Hatch and Use Them
Step-by-step guide to find, incubate, hatch, and use bug egg animals in Grow A Garden, boosting hatch rates and farm val