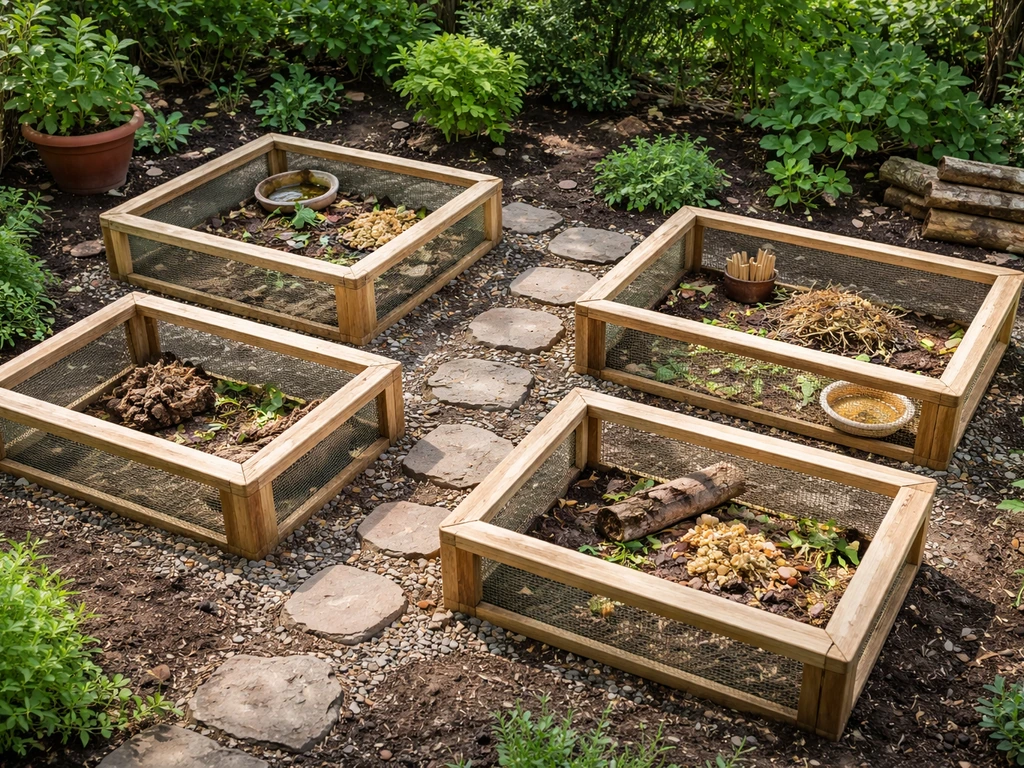
Growing your own bugs in Grow A Garden means setting up a self-sustaining breeding pipeline where you hatch, raise, and reproduce bug-type creatures directly on your farm instead of buying them from the market. You control the full cycle: sourcing the right eggs, running them through incubators, matching parents with compatible traits, and harvesting offspring with the mutations you actually want. Done right, it is consistently cheaper per creature than trading, gives you repeatable access to rare variants like Disco Bee or mutated Ladybugs, and turns your Bug Hut into a net-positive income source rather than a money sink.
Grow Your Own Bugs: Data-Driven Guide for Grow A Garden Players

Julian Russo
13 Jul 2026
What 'Grow Your Own Bugs' Actually Means in This Game
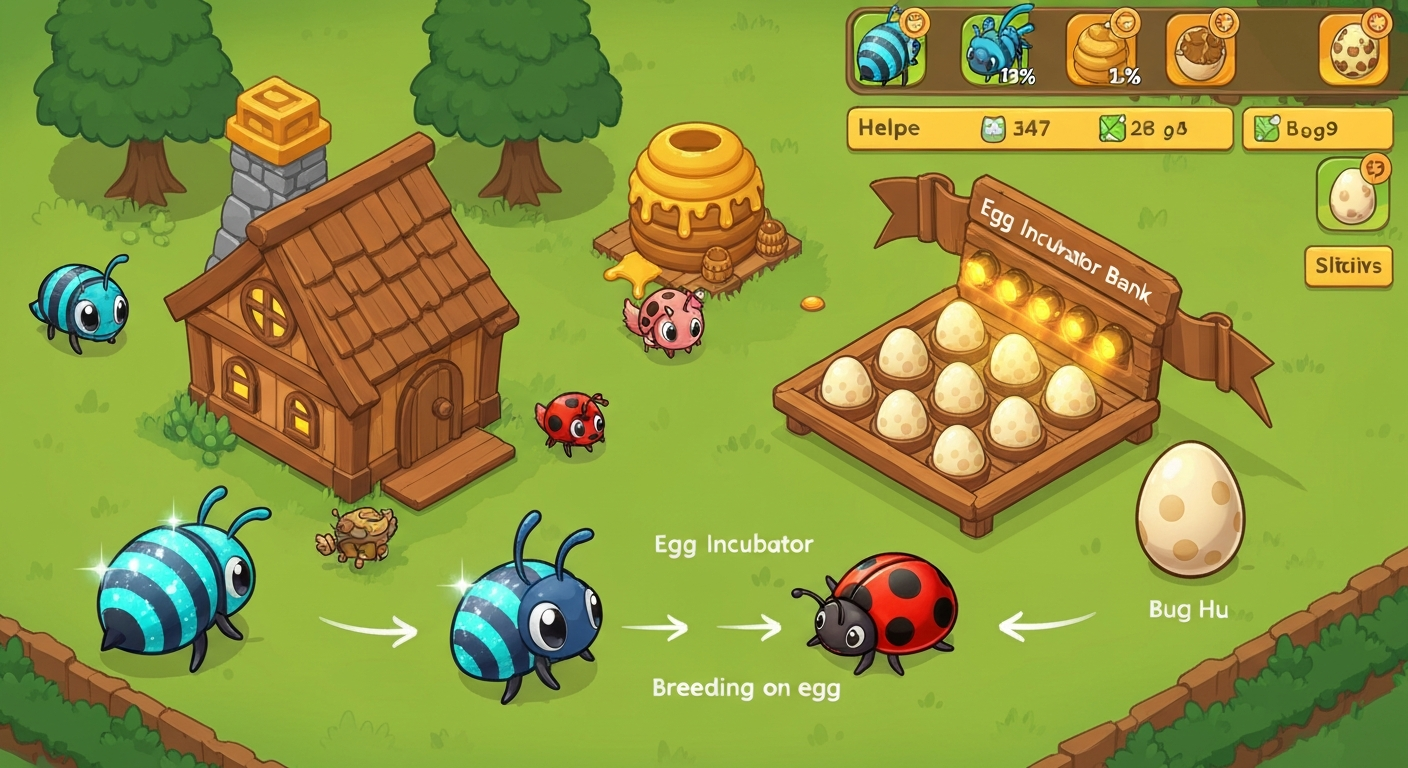
Grow A Garden treats bugs as a distinct creature category with their own egg types, hatch timers, and facility requirements. Unlike crops, bugs have a full lifecycle: egg acquisition, incubation, hatching, maturation, and breeding windows. 'Growing your own' refers to owning that entire chain. You are not just placing a creature on your farm and waiting. You are managing slot concurrency, stacking hatch-time boosts, reading mutation chance tables, and routing eggs through the right buildings at the right upgrade tier. The payoff is a farm that generates rare bug variants on a predictable schedule, which is where the real coin and crop-boost value comes from. The sibling topics covering grow bugs, grow lady bugs, the hive fruit bug, and the bug hut all feed into this master loop, and this guide connects all of them.
Quickstart Cheat-Sheet
If you want to jump straight into breeding without reading every mechanic section, here is a condensed one-page summary. Come back to the deeper sections when something does not work the way you expect.
| What you need | Details / Numbers |
|---|---|
| Bug Hut (Tier 1) | First building to place; holds up to 4 adult bugs; required before any bug egg can hatch into a resident |
| Egg Incubator (base) | Occupies 1 slot per egg; run eggs in parallel, not in sequence |
| Common Egg base hatch | 10 minutes |
| Uncommon Egg base hatch | 30 minutes |
| Bug Egg base hatch | 2 hours |
| Bee Egg base hatch | 4 hours 10 minutes |
| Zen Egg base hatch | 8 hours |
| Helper pet hatch boost (5 helpers) | +57% hatch-time reduction (community-verified); reported cap ~90% |
| Top Ladybug recipe parents | Common Bug + Common Bug with green/leaf trait pool; see Ladybug section for full chain |
| Anti Bee Egg craft cost | 1 Bee Egg + 25 Honey; craft time ~40 minutes; Disco Bee chance 0.25% |
| Hive Fruit Bug habitat | Requires active Hive structure nearby; see Hive section for placement rules |
| Mutation stacking example | Pollinated (×3) + HoneyGlazed (×5) + Voidtouched (×135) multiply together |
The single most impactful early upgrade is filling every incubator slot simultaneously rather than hatching eggs one at a time. Parallel hatching is how mid-game farms bridge the gap to the rare-mutation economy. Once you have helper pets stacked to the 57% reduction threshold, your Bug Egg effective hatch time drops from 2 hours to roughly 51 minutes per slot, and a four-slot setup is doing the work of a much larger sequential operation.
Core Mechanics: Eggs, Incubation, and Lifecycle Timing
Every bug starts as an egg with a fixed base hatch time. These timers are not estimates; they are hard-coded values that the community has verified through large-sample testing. The base times matter because every boost and modifier in the game is applied as a percentage reduction from that base, so knowing the floor is essential before you build a throughput model.
| Egg Type | Base Hatch Time | Notes |
|---|---|---|
| Common Egg | 10 minutes | Fastest cycle; best for volume experiments |
| Uncommon Egg | 30 minutes | Mid-tier pool; decent mutation access |
| Bug Egg | 2 hours | Core bug breeding egg; balanced time vs. pool quality |
| Bee Egg | 4 hours 10 minutes | Bee variants; craftable into Anti Bee Egg |
| Zen Egg | 8 hours | Longest base timer; high-rarity pool |
Incubation runs in discrete stages. An egg placed in an incubator slot starts its countdown immediately. Each slot is independent, so a five-slot incubator with five Bug Eggs running in parallel delivers five hatches at the same 2-hour mark, not at 10 hours. In‑game testing and patch logs confirm incubator slots run eggs in parallel with individual hatch timers, and that slot limits are tied to unlocked player slots while helper and gear modifiers apply per egg incubator slots run eggs in parallel with individual hatch timers, and slot limits are tied to unlocked player slots while helper/gear modifiers apply per egg. This concurrency is the fundamental throughput lever. The lifecycle after hatching moves through a maturation window before the creature becomes breedable. That window is shorter for Common types and longer for rarer ones. Do not attempt to force a breeding match during maturation; the game will not register the pair as eligible.
Breeding windows open once both parents have cleared maturation. The window is not infinite. If you miss it, the creature moves into a resting state and you have to wait for the next cycle. Experienced breeders time their incubation batches so both parent candidates mature at roughly the same moment, minimizing idle time between hatch and breed. Running matched-timing batches, where you start two compatible eggs in adjacent slots simultaneously, is the cleanest way to hit overlapping windows.
Breeding Fundamentals: Parents, Inheritance, and Reading Mutation Chances
Parent matching in Grow A Garden follows a pool-and-weight system rather than a simple dominant/recessive gene model. Each parent contributes trait influence to the offspring pool, and the game resolves the final outcome using weighted random draws. You cannot guarantee a specific output, but you can shift the probability distribution in your favor by selecting parents whose trait pools overlap with your target mutation.
How to Read Mutation Chances
Mutation chances are expressed as percentages in community databases, and it helps to think about them in expected-value terms. A 0.25% chance on a rare outcome like Disco Bee means you expect one hit every 400 hatches on average. If you run four slots in parallel on a 4-hour-10-minute Bee Egg cycle, you are completing roughly one batch every five hours (allowing for setup). Over a 24-hour period that is roughly four full batches, or 16 eggs. To expect even one Disco Bee you would need about 25 days of constant operation at that pace. That math tells you immediately that chasing 0.25% creatures is a long game, not a weekend project, and it informs whether you should prioritize throughput investment (more slots, more helpers) or diversify across lower-rarity targets.
Mutation stacking is where the big multipliers live. The Bizzy Bees event documented this clearly: Pollinated (×3), HoneyGlazed (×5), and Voidtouched (×135) combine multiplicatively, not additively. A creature carrying all three has its base value multiplied by 3 × 5 × 135 = 2,025 compared to a clean baseline. When you are evaluating whether a breeding target is worth the resource cost, always check how many stackable mutations apply to that species. Hive Fruit Bugs, for example, benefit from compound multipliers tied to event conditions, which is why they spike in trade value during active events and crater between them.
Inheritance Rules at a Glance
- Both parents must be mature and in an active breeding window simultaneously
- Parent trait pools weight the offspring draw; matching parents on the same target trait increases but does not guarantee that outcome
- Mutations from one parent can pass to offspring at reduced probability; stacked mutations on both parents increase transmission odds
- The Giant or Pet Incubator can modify base size and weight of hatched creatures (reported range: 5.2% to 30% size increase); this is a cosmetic/stat modifier, not a hatch-rate modifier
- Crafted eggs (like Anti Bee Egg) have fixed pools independent of parent traits; crafting is an alternative path when direct breeding is too slow for a target species
Buildings and Equipment You Actually Need
There are three core facilities for a bug breeding operation: the Bug Hut, the Hive, and the Egg Incubator. Each has a distinct role. The Bug Hut is your housing and throughput anchor. The Hive is required for bee-type and fruit bug variants and adds its own mechanic layer. The Egg Incubator is your timing infrastructure. Getting the build order wrong, specifically placing Hives before you have a functioning Bug Hut, is one of the most common mistakes I see new breeders make.
| Building | Primary Role | Key Upgrade Benefit | Footprint Notes |
|---|---|---|---|
| Bug Hut (Tier 1) | Houses adult bugs; enables breeding windows | Capacity: 4 bugs | Small footprint; place centrally |
| Bug Hut (Tier 2+) | Increased capacity and shorter breeding cooldowns | Capacity scales with tier; cooldown reduction per tier | Larger footprint; plan adjacency to incubators |
| Egg Incubator (base) | Runs individual egg timers; one slot per unit | Base: 1 slot; stacks with helpers for time reduction | Compact; cluster near Bug Hut |
| Giant Incubator | Modifies hatched pet size/weight stats | 5.2%–30% size/weight increase; per-egg cap applies | Use for stat-targeted runs, not pure throughput |
| Hive | Required habitat for bee and fruit bug types | Honey generation; unlocks Hive Fruit Bug interactions | Needs open adjacent tile; see Hive section |
One thing worth flagging: community sources have recorded conflicting tooltip descriptions for the Egg Incubator. Some older wiki entries describe it as increasing hatch time by 3x, while more recent patch-note archives and in-game testing describe it as reducing hatch time when powered. Always verify the current tooltip in your game client before building throughput models around incubator behavior, because this wording has shifted across updates. When in doubt, do a controlled 10-egg timing test before committing resources to a large batch.
Bug Hut Deep Dive: Placement, Capacity, and Maximizing Egg Throughput
The Bug Hut is the foundation of everything. Without it, hatched bugs have nowhere to mature, and without mature bugs you have no breeding candidates. Tier 1 holds four adult bugs, which sounds limited but is actually enough to run two simultaneous breeding pairs. The real constraint early on is not capacity but the breeding cooldown timer between matches. Upgrading to Tier 2 reduces that cooldown and adds slots, which is why Bug Hut upgrades have a better return on investment than adding more incubators before your housing is maxed.
Placement Rules That Actually Matter
- Place the Bug Hut near your incubator cluster so newly hatched bugs auto-populate without manual transport delays
- Leave at least one open adjacent tile on each side for future Hive placement if you plan to breed bee-type bugs
- Avoid placing the Bug Hut at the farm edge; central placement minimizes path length for helper pets applying boost effects
- Build order recommendation: Bug Hut Tier 1 first, then at least two Egg Incubators, then upgrade Bug Hut to Tier 2 before adding Hive infrastructure
Throughput Math for the Bug Hut
A Tier 1 Bug Hut with two active breeding pairs and a 2-hour Bug Egg cycle produces a theoretical maximum of two offspring per 2-hour window, or about 24 offspring per day per pair under ideal conditions. In practice, maturation delays and breeding-window gaps reduce that to roughly 16 to 18 per day per pair. Upgrading to Tier 2 and stacking five helper pets (57% hatch reduction) brings effective cycle time for Bug Eggs down to approximately 51 minutes, which pushes daily output per pair closer to 28 offspring. That difference compounds fast over a week of operation and is the clearest argument for prioritizing helper pet acquisition alongside your Hut upgrade.
Maintenance Checklist
- Check Bug Hut capacity before starting a new incubation batch; a full Hut blocks newly hatched bugs from entering
- Clear any bugs that have completed their breeding cooldown and are not scheduled for another match to free up slots
- Verify helper pets are active and in range before each batch starts; a helper pet out of range does not apply its boost
- After any game update, re-verify incubator behavior with a small test batch before resuming full-scale operations
Hive and Fruit Bug Mechanics: Special Rules You Need to Know
The Hive is not just a decorative building. It is an active habitat that unlocks a separate set of bug interactions, most importantly those involving the Hive Fruit Bug. The Hive generates Honey as a resource, which feeds into crafted egg recipes (the Anti Bee Egg requires 25 Honey per craft). It also establishes the habitat condition that Hive-type bugs require to exist and breed on your farm.
Hive Fruit Bug: What Makes It Different
The Hive Fruit Bug has a conditional activation mechanic tied to the Hive building being present and functional within its proximity range. If the Hive is inactive, damaged, or out of range, the Hive Fruit Bug loses access to its unique interaction bonuses, which include the compound mutation multipliers mentioned earlier. During active events like Bizzy Bees, those multipliers (Pollinated ×3, HoneyGlazed ×5, Voidtouched ×135) can make a fully mutated Hive Fruit Bug one of the highest-value creatures on your farm by a wide margin. Between events, its base value is much more modest, so the economic case for a dedicated Hive Fruit Bug breeding setup is heavily event-dependent.
- Hive must be within the Hive Fruit Bug's proximity range (check building tooltip for exact tile radius)
- Honey generation from the Hive should be balanced against Anti Bee Egg crafting demand; do not drain Honey reserves below 25 if you plan to craft Anti Bee Eggs
- Hive Fruit Bugs benefit from the same parallel incubation rules as other bug types; no special slot restrictions apply
- Mutation stacking for Hive Fruit Bugs is multiplicative; acquiring creatures with two or more stacked mutations simultaneously dramatically increases trade value
- During non-event periods, Hive Fruit Bugs revert to standard bug value tiers; plan your breeding cycles around the event calendar
Anti Bee Egg: The Crafting Route
The Anti Bee Egg is the primary crafted egg for bee-type content and the most documented crafting recipe in the community. The formula is 1 Bee Egg plus 25 Honey, with a craft time of approximately 40 minutes. The resulting egg has a hatch time of 4 hours 10 minutes (same base as a standard Bee Egg) but a distinct pool that includes Disco Bee at 0.25%. That pool composition is the point. You are paying the 25 Honey premium specifically to access creatures that do not appear in the standard Bee Egg pool. At current Honey generation rates from a single Hive, expect to sustain roughly one Anti Bee Egg craft every 2 to 3 hours of Honey accumulation, depending on your Hive upgrade tier. Running this craft in parallel with your standard incubation batches is the efficient approach.
Step-by-Step Ladybug Breeding Recipe
Ladybugs are one of the most consistently requested breeding targets because they have a reliable mutation pathway, a relatively short cycle time compared to bee-type bugs, and strong crop-interaction bonuses that make them useful on almost any farm layout. Here is the full recipe as I run it, including timings, costs, and the troubleshooting points that trip people up most often. For a step-by-step walkthrough on how to grow lady bugs on your farm, see our guide to grow lady bugs.
Parents and Egg Selection
Ladybugs breed from the Common Bug line. The most efficient parent combination uses two Common-tier bugs with overlapping green or leaf trait signatures in their pool. You do not need both parents to carry the Ladybug-specific trait already; you need their pools to weight toward it. Sourcing parents from Bug Eggs (2-hour hatch) rather than Common Eggs (10-minute hatch) gives you parents with broader trait pools, which increases the chance of the offspring draw landing on a Ladybug outcome rather than a generic common-tier bug.
- Hatch two Bug Eggs in parallel incubator slots (2-hour base time; reduce with helpers to ~51 minutes at 57% boost)
- Allow both to complete the maturation window before proceeding
- Check that both parents are in an active breeding window simultaneously; stagger your incubation start times by no more than 10 minutes to hit overlapping windows
- Initiate the breeding match in the Bug Hut; confirm both parents are assigned before closing the interface
- Wait for the offspring egg to be produced; this egg goes back into an incubator slot for hatching
- Hatch the offspring egg; if the result is a Ladybug, proceed to mutation assessment; if not, the offspring becomes a new parent candidate for the next cycle
Timings and Resource Costs Per Cycle
| Step | Base Time | Time with 57% Boost | Resource Cost |
|---|---|---|---|
| Hatch parent 1 (Bug Egg) | 2 hours | ~51 minutes | 1 Bug Egg |
| Hatch parent 2 (Bug Egg) | 2 hours | ~51 minutes | 1 Bug Egg |
| Maturation window | Varies by tier; estimate 15–30 min | Same; boost does not apply | None |
| Breeding match cooldown | Varies by Bug Hut tier; Tier 1 baseline | Reduced at Tier 2+ | None (housing cost already paid) |
| Hatch offspring egg | 10–30 minutes (Common/Uncommon type) | ~5–13 minutes with boost | 0 (offspring egg is produced by breeding) |
| Total per full cycle (no boost) | ~4.5–5 hours | — | 2 Bug Eggs minimum |
| Total per full cycle (57% boost) | — | ~2–2.5 hours | 2 Bug Eggs minimum |
Mutation Notes for Ladybugs
Ladybugs have a modest but reliable mutation pathway. The most common desirable mutation is a color-variant or crop-affinity tag that boosts adjacent plant yield. These mutations are not ultra-rare (unlike Disco Bee at 0.25%), so you can realistically expect to see your first mutated Ladybug within 10 to 20 successful Ladybug hatches, rather than hundreds. To improve your odds further, use parents that already carry at least one mutation; the transmission probability is not 100% but it is meaningfully higher than breeding from clean parents. If you are three or more generations deep into a Ladybug line without seeing the target mutation, check whether your parent trait pools have drifted. This happens when players accidentally cycle in unrelated common bugs as parents mid-chain.
Troubleshooting Ladybug Breeding
- Not getting Ladybug offspring at all: Confirm parents are fully matured, not just hatched; a bug exits the incubator but still needs maturation time before it registers as a valid breeding candidate
- Breeding window keeps missing: Stagger parent egg start times to no more than 10 minutes apart so both parents are ready simultaneously; large stagger gaps mean one parent exits its window before the other is ready
- Mutations not transmitting: Verify that at least one parent carries the target mutation; clean-parent breeding relies purely on base pool RNG and will be slower
- Bug Hut full, blocking new hatches: Hatch offspring into a temporary holding state by clearing non-breeding adults first; running the Hut at max capacity stops newly hatched bugs from entering and silently fails the hatch-to-housing step
- Inconsistent incubator behavior: If your effective hatch times do not match expected values after applying helper boosts, re-test with a single egg and no helpers to confirm base time, then add helpers one at a time to isolate the stacking issue
- After a game update: Egg pools and trait weights are among the most frequently patched values; re-run a 10-egg control batch after any major update before assuming your previous yield rates still apply
Economics: Is Breeding Worth It vs. Buying?
The honest answer is: breeding is almost always worth it for volume, and buying is better for one-off rare targets with very low hit rates. If you want five Ladybugs, breeding them yourself over two to three days of normal play is cheaper than buying five from the market, especially when market prices for mutated variants spike during events. If you want a single Disco Bee, the expected cost of 400 Anti Bee Egg hatches (plus 400 × 25 = 10,000 Honey in crafting costs) may be higher than the current market price depending on where the meta sits. Community trade aggregators and price-history databases are the right tool for this comparison. The Grow a Garden Calculator, Crops, Pets & Mutations Tool (GAGdata) aggregates pet/crop value tables, egg trade values, and hatch-time calculators that the community uses for these economic comparisons Grow a Garden Calculator — Crops, Pets & Mutations Tool (GAGdata). Check current market values before committing to a long breeding campaign for a specific ultra-rare creature.
Where breeding consistently wins economically is in the mutation-stacked mid-tier market. A Ladybug with two stacked mutations sells for a multiple of the clean variant price, and the breeding pathway to get there is repeatable and resource-light compared to chasing 0.25% drops. Mutated Hive Fruit Bugs during active events are another strong example: the compound multipliers (Pollinated, HoneyGlazed, Voidtouched) can make a single well-mutated specimen worth more than dozens of clean equivalents. Planning your breeding cycles around the event calendar so you are producing high-multiplier candidates when those multipliers are active is the highest-leverage economic strategy in the bug breeding meta.
Keeping Your Setup Current After Updates
Grow A Garden patches frequently, and bug mechanics are among the most commonly adjusted systems. Egg pool compositions change, incubator tooltip wording has historically caused confusion about whether the item speeds or slows hatch time, and crafting recipes like the Anti Bee Egg have had their Honey costs adjusted. The practical habit that saves the most frustration is running a small control batch after every significant patch before resuming normal operations. Ten eggs, no modifiers, timed manually against the documented base hatch time. If the number does not match, something changed and you need to re-read the patch notes before rebuilding your throughput model. Community patch archives and weekly update hubs are the fastest way to track what shifted without having to discover it through a failed breeding run.
FAQ
What is the single-sentence research goal for this guide?
Produce a reproducible, data-driven reference that documents exact breeding/recipe steps, timings, costs, mutation/chance mechanics, throughput math, facility requirements, economic valuations and optimization patterns needed for mid-to-hardcore Grow A Garden Strategy players to reliably “grow your own bugs.”
Which raw game data must I collect before writing the guide?
Per-egg base hatch times and pools, craft/recipe inputs and craft times, incubator/gear/tooltip text/screenshots, helper pet/boost numeric tooltips, facility slot/unlock rules, per-pet base stats (size/weight/value), mutation/bonus multipliers, market price history for eggs/pets/crops, and patch-note change logs.
Which authoritative sources should I archive and cite?
Official patch notes/dev posts and Discord announcements; in-game UI screenshots (eggs, incubator, crafting station, helper tooltips); community-maintained databases (GAGdata, Grow-a-Garden Calculator, Grow-a-Garden Wiki/Fandom); trade/price aggregators (trade value sites); and any community testing logs or meta posts documenting stacking rules.
What community-reported mechanics require controlled in‑game verification?
Egg incubator direction and magnitude (some sources conflict), stacking rules for helper pets and boosters (reported caps and percent reductions), incubator/giant incubator effects on pet size/weight, per-egg parallelism and slot rules, and mutation multiplier interactions (multiplicative stacking vs additive).
What specific experiments/tests should I run and how should they be designed?
Controlled hatch-time runs: hatch identical eggs with/without single modifiers to measure % change. Incubator direction test: same egg, same helpers, incubator on vs off. Stacking test: vary helper count to map incremental benefit and locate cap. Mutation probability test: craft/hatch large sample of target-recipe eggs to estimate rare drop rates. Throughput test: deploy max concurrent eggs to verify slot rules. For each test, log timestamps, player state, gear, and patch version.
How many trials are required to estimate probabilities with usable precision?
Use standard sample-size formulas: for ±5% margin at 95% confidence, n≈385 trials for common probabilities. For rare outcomes (p≈0.25% or lower) you need much larger n (thousands); use a proportion sample-size calculator to set n for desired margin and confidence.
Next Article
Grow Bug Hut Guide: Build, Place, Upgrade, Optimize
Build and optimize a bug hut in Grow A Garden: placement, upgrades, egg and breeding efficiency, plus troubleshooting an