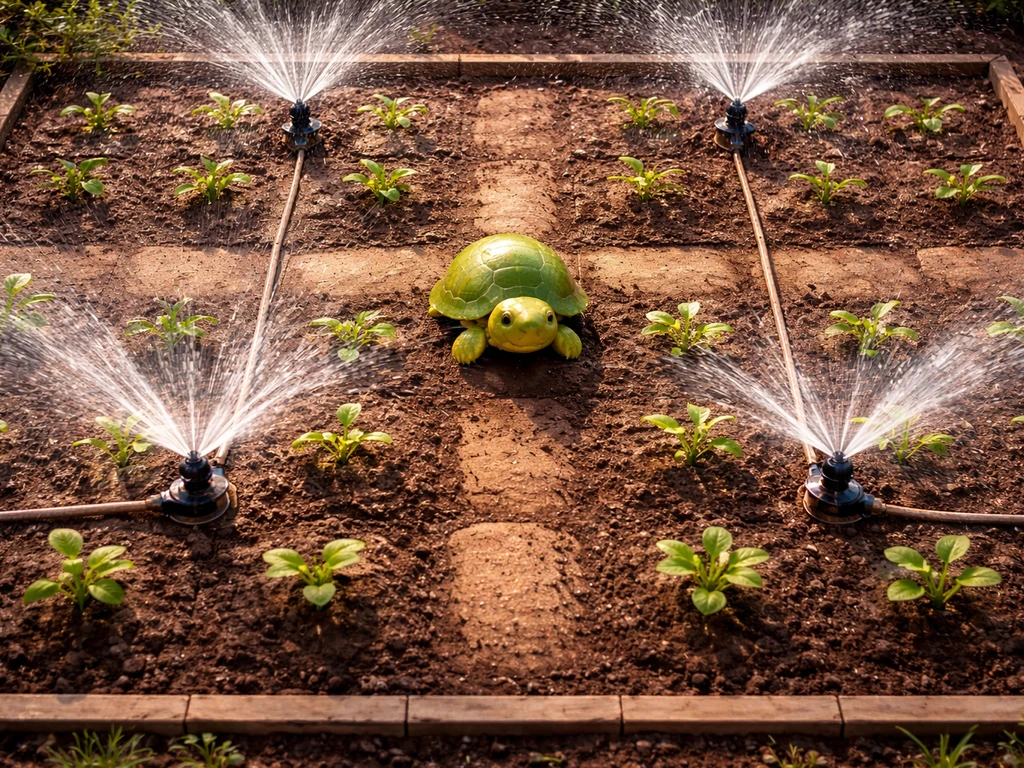
The turtle method in Grow A Garden is a sprinkler-focused farming strategy built around the Turtle pet's passive ability, which extends how long every sprinkler in your garden stays active. Instead of constantly refilling or resetting sprinklers by hand, you let the Turtle carry the uptime load while you stack crops, eggs, and harvests on top of that extended watering window. If you also want to push crop growth alongside that turtle uptime plan, make sure your layout keeps Lemon Lion bug gardening efficient from seed to harvest lemon lion bug grow a garden. Done right, it's one of the most hands-off efficiency builds in the game right now.
Turtle Method Guide to Grow a Garden Efficiently

Julian Russo
5 Jun 2026
What the turtle method means in Grow A Garden
The method is named after the Turtle pet, which has a passive called Turtle Tinkerer that buffs every sprinkler in your garden simultaneously. The core idea: sprinklers drive crop growth without requiring manual watering, so anything that extends sprinkler uptime directly multiplies your effective harvest output. The turtle method is the practice of building your entire garden layout and workflow around maximizing that sprinkler uptime buff, rather than treating the Turtle pet as a nice bonus you toss in after the fact.
It's worth separating this from the broader 'turtle-paced' play style some players refer to (slow, defensive expansion). This is a specific mechanic-driven method, not a personality trait. You're optimizing around a pet ability, not just playing cautiously.
Why it's effective: inputs, outputs, and growth mechanics
Sprinklers in Grow A Garden have a finite active duration. Once they run dry, crops in their coverage zone stop getting watered and growth slows or stalls. The Turtle pet's passive extends every sprinkler's active time by roughly 20%, which sounds modest until you think about it across a full garden. If you have six sprinklers running, that's six simultaneous uptime extensions. Compounding that over multiple harvest cycles, you're pulling significantly more crops per session without adding any extra labor or resources.
The input side stays constant: same number of sprinklers, same plots, same seeds. The output side improves because crops have more consistent water coverage and fewer dry gaps between sprinkler cycles. If you want to grow even more with less effort, focus your layout around the turtle method and its sprinkler uptime extension turtle bug grow a garden. Fewer dry gaps means fewer stalled growth timers, which means faster harvests and more cycles per play session. In practice, the ladybug ability helps you grow a garden by improving how your plants thrive between watering cycles ladybug ability grow a garden. That's the mechanical reason this method works. It's not magic, it's uptime compression.
For mid-to-hardcore players, this also means the turtle method scales well. Adding more sprinklers multiplies the effect because the Turtle buff applies to all of them. Larger gardens with dense sprinkler coverage see bigger absolute gains than small starter setups, which is why this strategy really shines once you've expanded your plot space.
How to set up your garden for the turtle method
Before anything else, you need the Turtle pet active and placed in your garden. The Turtle's passive is always-on once the pet is deployed, so placement isn't about triggering a skill manually. What matters is that the Turtle is present and the pet slot is occupied by it, not something else. Don't run a hybrid build where the Turtle competes with a different pet for the same slot if you're trying to execute this method properly.
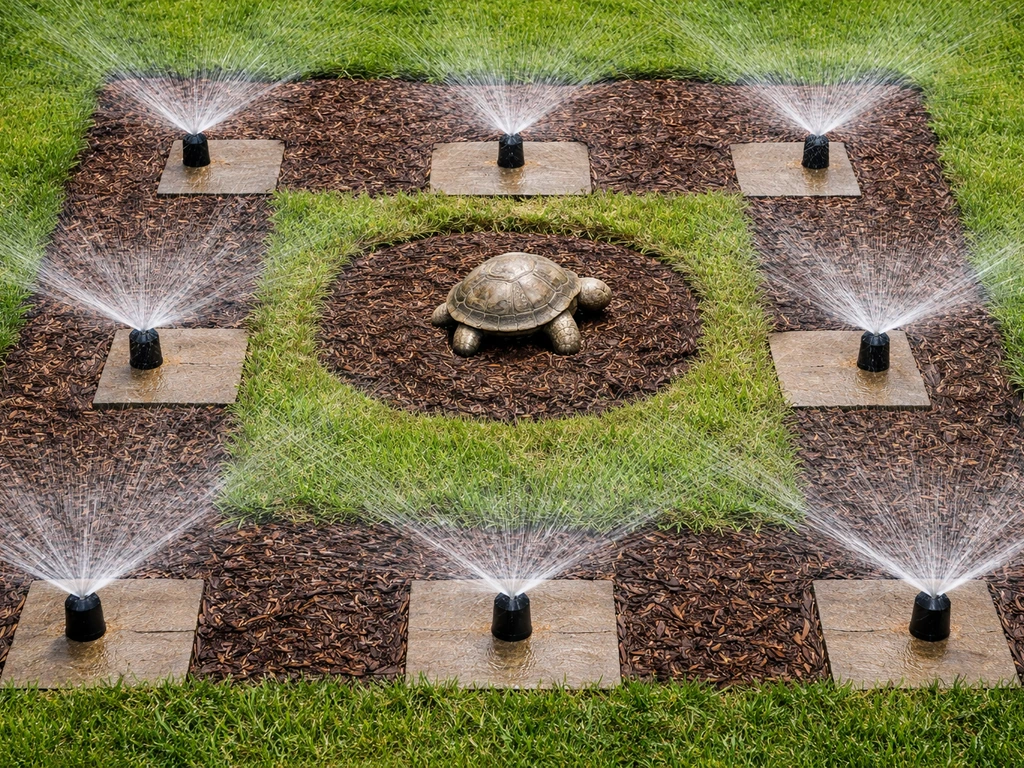
For the garden layout itself, the goal is maximum sprinkler coverage across your crop plots. Every tile that gets consistent sprinkler coverage benefits from the Turtle's uptime extension. If you are also managing honeysuckle bugs as part of your Grow A Garden routine, the same planning mindset helps you keep your garden stable while you scale up honeysuckle bug grow a garden. Tiles that fall outside sprinkler range gain nothing from the method, so a patchy sprinkler setup wastes the buff. Set up your sprinklers before you plant, not after, so you can confirm coverage and fill gaps.
- Place your Turtle pet in an active pet slot before doing anything else in this setup.
- Map out your crop plot tiles and plan sprinkler positions to achieve full or near-full coverage.
- Place sprinklers first, then plant crops only in tiles that fall within at least one sprinkler's range.
- Leave a small buffer of empty tiles near the edges if your sprinkler count is limited — it's better to have dense coverage on fewer tiles than thin coverage on all of them.
- Once crops are planted and sprinklers are running, verify the active timers look longer than they would without the Turtle. If they don't seem extended, double-check your pet slot assignment.
Breeding and eggs workflow: timing, stacking, and creature choices
To get the Turtle pet in the first place, you need to hatch a Turtle egg. The hatching process works the same way for every egg in Grow A Garden: equip the egg from your inventory, then place it on any empty plot tile in your garden. Once it's placed, the hatch countdown starts. Don't place eggs on tiles that are already occupied by crops or structures, since the egg needs an empty space to begin incubating.
Timing your hatching matters more than most players realize. If you're running a full crop cycle, you don't want to tie up prime plot tiles with eggs during peak harvest windows. The better move is to hatch eggs during downtime, such as right after a harvest when plots are empty and you're re-planting anyway. That way the egg occupies a tile that would've sat empty regardless, and you lose nothing on your crop output.
Stacking eggs is also viable if you have multiple empty tiles. You can start several eggs at once by placing each one on a separate empty tile. This is useful when you're trying to build a reserve of pets or roll for higher-rarity variants. Just track the countdown timers so you don't accidentally harvest over an unhatched egg later.
For creature selection beyond the Turtle itself, the best supporting pets for this method are ones that don't conflict with the sprinkler synergy. Avoid pets whose passives interact with manual watering or drought mechanics, since those passives become irrelevant or counterproductive when your whole strategy is automated sprinkler coverage. Pets that boost harvest yield or crop value layer on top of the turtle method without disrupting it.
Optimization guide: space, placement, and resource prioritization
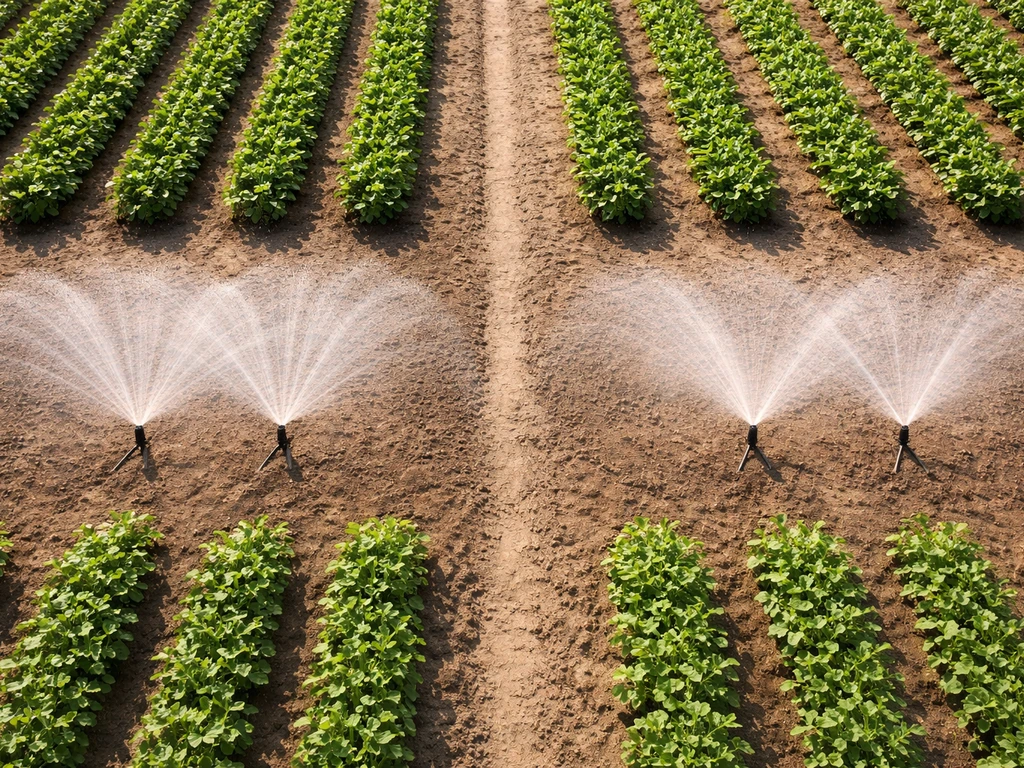
Space efficiency is the biggest lever in this method. The Turtle's buff is fixed as a percentage, so the more sprinklers you have active simultaneously, the more raw uptime you gain in absolute terms. Prioritize expanding your plot before adding more crop variety. A larger plot with full sprinkler coverage and the Turtle active will always outperform a small plot with diverse crops but patchy watering.
For resource prioritization, spend on sprinklers before cosmetics or non-essential upgrades. Every additional sprinkler you place is another unit of the Turtle buff in play. After sprinklers, prioritize high-value seeds for the covered tiles. There's no point filling Turtle-buffed, well-watered plots with low-value crops. Match your best seeds to your best-covered tiles.
| Priority | Action | Why it matters |
|---|---|---|
| 1 | Activate Turtle pet in pet slot | No Turtle, no method — this is the entire foundation |
| 2 | Expand plot tiles | More tiles means more sprinkler placements and more buff surface area |
| 3 | Place sprinklers for full coverage | Maximizes the number of tiles benefiting from extended uptime |
| 4 | Plant high-value seeds in covered tiles | Converts the uptime advantage into maximum coin/resource output |
| 5 | Hatch secondary support pets | Adds yield or value multipliers on top of the uptime base |
| 6 | Reinvest harvests into more sprinklers/plots | Compounds the method as your garden scales |
One placement tip that's easy to miss: sprinklers placed at the corners of your plot often have the worst coverage efficiency because a large fraction of their range falls outside the plot boundary. Center your sprinklers as much as possible so their radius hits active crop tiles on all sides, not dead space beyond the edge.
Troubleshooting and common mistakes
Low yields despite running the method
The most common cause of disappointing results is having the Turtle in your inventory but not actually deployed in an active pet slot. The passive only works when the pet is placed and active. Check your pet assignment screen before blaming the method itself.
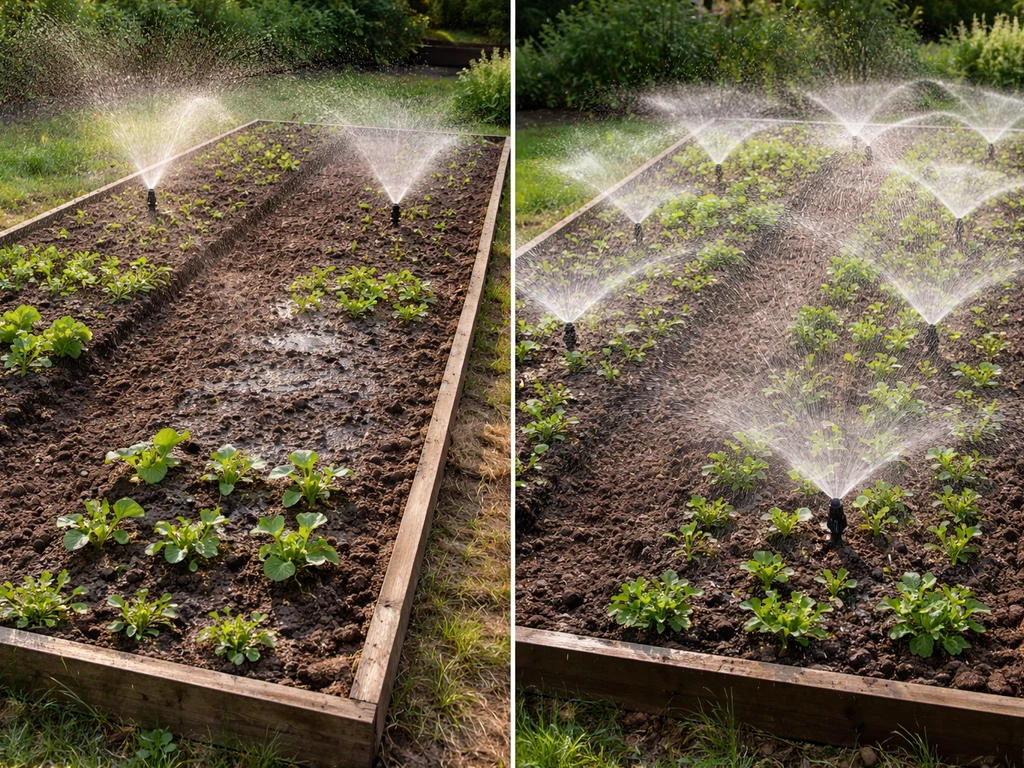
Second most common issue: sprinkler coverage gaps. If some crop tiles aren't covered by any sprinkler, those tiles don't benefit from the Turtle buff and will produce at base rate. Walk through your plot tile by tile and look for dry patches during active sprinkler cycles.
Bottlenecks that stall progress
- Not enough sprinklers: If you only have one or two sprinklers, the absolute gain from the 20% extension is small. The method scales with sprinkler count, so early-game players see modest gains until they invest in more sprinklers.
- Low-value crop choices: Extended watering on mediocre crops still produces mediocre results. Upgrade your seed selection to match the uptime advantage you're generating.
- Egg placement conflicts: Hatching eggs on prime covered tiles during active harvest windows wastes plot space. Time your hatches for downtime windows.
- Competing pet passives: Running another pet that doesn't complement sprinkler automation splits your passive value. Commit to the Turtle as your core pet for this method.
- Ignoring the turtle bug interactions: There are known quirks with how the Turtle's passive interacts with certain sprinkler types or placement configurations. If you're seeing unexpected behavior, check community reports on turtle-specific bugs, as those interactions can sometimes reduce the effective buff in edge cases.
Measuring success and when to upgrade or switch strategies
A successful turtle method run has a clear signature: your sprinklers are consistently running longer between refills or resets than they did before deploying the Turtle, your crop tiles have minimal dry-time between watering cycles, and your harvests per session are increasing as you scale up sprinkler count. If all three of those are true, the method is working. If you're also growing artichokes or chasing the artichoke bug in Grow A Garden, keep your sprinkler uptime consistent so your crops hit the right growth windows artichoke bug grow a garden.
For concrete benchmarks, you should be seeing at least a noticeable increase in harvest frequency compared to a no-Turtle setup with the same plot size and sprinkler count. The 20% sprinkler uptime extension doesn't sound dramatic, but across five or six sprinklers over several in-game days, you're compressing multiple extra harvest cycles into your session. If you're not seeing more frequent harvests, revisit coverage and pet assignment.
When to consider upgrading within the method: once your plot is fully covered with sprinklers and you're running high-value seeds, the next lever is pet rarity. A higher-rarity Turtle variant may offer a stronger version of the Turtle Tinkerer passive, amplifying the uptime extension beyond the base 20%. Chasing a rarity upgrade through targeted egg hatching is a natural mid-to-late progression step for players who've maxed out their basic turtle method setup. To speed up your garden progress, focus on hatching and stacking eggs that help you grow the best lollipop bug grow a garden setup.
When to switch strategies entirely: if you hit a ceiling where adding more sprinklers or upgrading seeds no longer meaningfully moves your output, it's worth evaluating whether a different pet passive would serve your current garden size better. Some players transition to pets like the Ladybug or others that offer direct yield multipliers rather than uptime extension, especially once their watering problem is fully solved. The turtle method is a strong foundation, but it's not the only end-game path, and recognizing when sprinkler uptime is no longer your limiting factor is the skill that separates good optimizers from great ones.
Quick checklist before each session
- Turtle pet is deployed in an active slot, not sitting in inventory.
- All sprinklers are placed for maximum tile coverage, not stacked in one corner.
- Crop tiles outside sprinkler range are left empty or used for egg hatching during downtime.
- Highest-value seeds available are planted in the best-covered tiles.
- Any queued eggs are placed on empty tiles during low-activity windows to avoid wasting covered crop space.
- After harvesting, reinvest enough resources to add at least one more sprinkler per session until full coverage is achieved.
- Check for any game updates or balance patches that affect Turtle passive values or sprinkler mechanics before optimizing further.
FAQ
Why does my Turtle method not increase harvests even though I own a Turtle?
No. The Turtle passive only buffs sprinklers that are actively deployed and within the garden while the Turtle is in an occupied pet slot. If you hatch a Turtle but forget to assign it to the active pet slot, or you swap to another pet, your sprinkler uptime will drop back to base and the method stops compounding.
Are corner sprinkler placements reducing the effectiveness of the turtle method?
Treat corners and edges as “low-value coverage” zones. Even if a sprinkler is placed, tiles that sit outside its effective radius do not get the uptime extension impact. A practical fix is to leave a margin and place sprinklers more toward the center so their radius overlaps more crop tiles instead of wasting range beyond the plot boundary.
Should I plant more crop types sooner, or focus on fewer high-value crops for the turtle method?
If you add crop variety, do it only after sprinkler coverage is already dense. The method amplifies what sprinklers are already doing, so spreading seeds across poorly covered tiles dilutes results. A simple decision rule is, if a new bed has any tiles that do not get sprinkler overlap during an active cycle, prioritize adding or repositioning sprinklers before changing crops.
Can I stack Turtle eggs, and what’s the risk to my planting and harvest timing?
Yes, you can hatch multiple Turtle eggs, but you must manage the incubating tiles carefully. Do not place an unhatched egg on a tile you plan to harvest from immediately, since the egg occupies that plot space. If you accidentally harvest over an egg tile, you can lose the planned timing and delay your next pet availability.
When is the best time to hatch Turtle eggs for a full garden cycle?
Hatching right after a harvest usually has the best opportunity cost, but you should confirm plots are actually empty before placing eggs. If you hatch during a window where you still need re-planting tiles to hit growth cycles, you risk idling covered space or breaking your intended replant rhythm.
Should I chase a higher-rarity Turtle right away, or after I optimize sprinklers and layout?
Upgrading pet rarity can help, but only after you have eliminated the two big failure points, Turtle not deployed and sprinkler coverage gaps. If you upgrade rarity while some tiles are outside sprinkler overlap, you are paying for a stronger uptime buff on fewer effective tiles, which limits the real-world gain.
What types of other pets should I avoid in a turtle method build?
In many cases, yes. If another pet passive changes how watering behaves (for example, anything that assumes manual watering or alters drought timing), it can interfere with the “sprinklers do the work” premise. A safe approach is to choose support pets that either increase harvest value directly or do not affect watering logic at all.
What should I troubleshoot first if the turtle method still feels weak?
Look for the “coverage first” benchmark. If your harvest frequency is not increasing at all, compare your before and after results using the same plot size and sprinkler count, then verify two checks: Turtle is in the active pet slot, and each crop tile receives sprinkler coverage during the cycle. If both are correct, only then consider seed value and rarity progression.
Will the turtle method work on a starter-sized garden, or is it only good after I expand?
You can run the method on a smaller plot, but it tends to look worse because the Turtle buff is a percentage and its absolute benefit is proportional to how many sprinklers are running on effective tiles. A quick planning move is to expand plot space until sprinkler overlap covers most crop tiles, then start comparing performance rather than judging early on.
What upgrades should I prioritize while using the turtle method?
Do not spend heavily on cosmetics or non-essential upgrades that do not increase sprinkler count or supported tile overlap. Once sprinkler placement is dense, shift your priority to the highest-value seeds that match those covered tiles, because the method keeps watering reliable and seed value becomes your next main lever.
Next Article
Nihonzaru Bug Grow a Garden Guide: Farm Plan to Breed
Step-by-step Grow a Garden plan to breed the Nihonzaru bug on your farm, with fixes for spawn and growth issues.